
Overview
Document Transformations in Transsend are used to convert a message into Word, Excel or PDF documents.
Word files can be in either doc or docx format.
The first step is to design the format of the output document. This is done by creating a Word document in Microsoft Word and inserting Mail Merge Fields where data from the message is to be placed. This file is then uploaded into Transsend by selecting the file name and file type.
As messages are received and processed by the Route, Transsend will create a document based on the configuration and deliver this as an email attachment.
Designing The Document Template
A Word document is used as a template to generate new documents based on incoming messages and the data they contain. This template will be combined (merged) with the data from an incoming message to generate the final output. The template document can be in either doc (Word 97-2003) or docx (Word 2007-2010) format.
The template is created in Microsoft Word and contains Mail Merge Fields where the field names match the External Label of the data fields in the Transsend Template from which the message was created.
When the incoming message is received and the Route processed, the Merge Fields are replaced with the specified data values from the message.
In addition, some Mail Merge Fields are required to control the flow of message data into the document or to alter the output like inserting a checkbox for example.
Inserting Mail Merge Fields
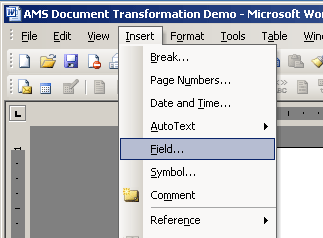
The process of inserting a Mail Merge Field into a document template is the standard Microsoft Word process (which may vary between versions of Office).
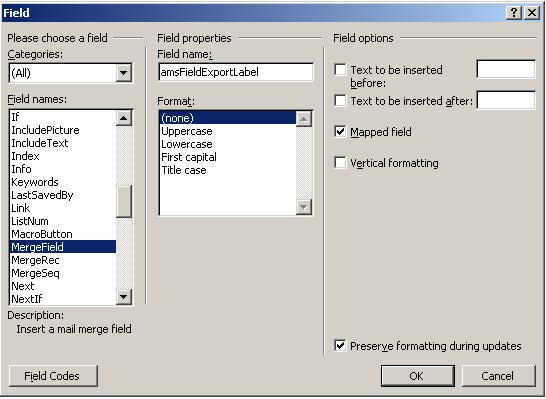
The only extra setting required is to specify the field as being a ‘Mapped Field’.
- In Word for Windows this is done by selecting the ‘Mapped Field’ option in the Field dialog box.
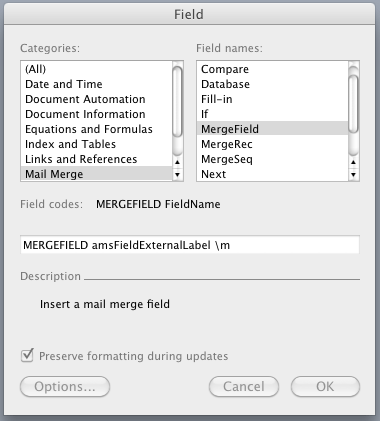
- In Word for Mac this option is not present but can be specified by following the name of the Merge Field with the " \m” flag (note the extra space before the “")
- Placing a ' \m’ after the field name will work in Windows as well.
The name of the fields must match the Transsend field external label exactly, and the match is case sensitive.
Word 2003 on Windows Field Dialog
Word 2003 on Windows Field Menu
Word 2008 on Mac Field Dialog
Mail Merge Regions
For simple documents with no repeating areas of content, a document can be created that just contains mail merge fields.
For more complex messages and document, where sections of the content repeats, it is necessary to surround the desired section of the document with two special merge fields. These are <<TableStart:regionName>> and <<TableEnd:regionName>> where regionName is the external label of either the Transsend Template or List Card (repeating card).
Merge regions cannot span document sections. For example a region cannot span a page break.
Once these merge fields have been placed in the document it is possible to insert Merge Fields for the data items from the message.
The name of the Merge Field should match the name of the field or meta data to be inserted.
If a region represents a List Card, then the content of the region will be repeated for each item contained in the message for that List Card. In this way it is possible, for example, to create a repeating set of table rows within a document based on multiple data “rows” (List Cards) within the message.
Note that region fields are case sensitive and the ‘TableStart’ and ‘TableEnd’ must be as specified.
More detail on how to create repeating sections is provided below.
Note that currently merge regions cannot be nested.
Repeating Content
Normally any part of a message that contains multiple items, such as entries from a List Card, will repeat the content within its associated region.
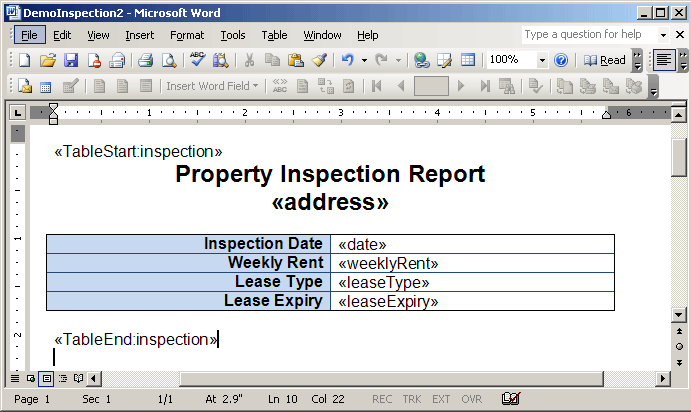
In order to repeat rows in a table then it is necessary to place the <<TableStart:regionName>> in the first column of the table, prior to any merged fields from the message. Merge Field for the data to go in that cell and subsequent cells in the row. Similarly, the {{<<TableEnd:regionName>>}} must be placed in the final column in the row, after the last Merge Field data item.
The following screenshot illustrates this:

Inserting Checkboxes
It is possible to configure a Merge Field to display as a checkbox. The checkbox will be checked (crossed) if the value is matched. To achieve this, enter the name of the Merge Field as «CheckBox:fieldExternalLabel_[Value To Match]».
For example, if the Transsend Field is a Choice Group with external label ‘inspectionResult’ and possible values ‘Pass’ or ‘Fail’ it is possible to have these displayed as checkboxes by adding two Merge Fields with field names «CheckBox:inspectionResult*[Pass]» and «CheckBox:inspectionResult*[Fail]».
If the value to match for the checkbox contains whitespace the then § symbol must be inserted in place of the whitespace in the merge field.
For example if the choice to match from the the form for a field with external label ‘action’ is ‘Stock Update Requested’ then the checkbox merge field should be «CheckBox:action_[Stock§Update§Requested]». To enter the § on Windows this is ALT key code 0167.
Inserting Images
To insert an image, such as a captured signature, use the field name format {«Image:amsFieldExternalLabel»}} e.g. «Image:signature».
Inserting Message Details
To insert a value from the message details (if this has been enabled for the route) such as the mobile account username, prefix the message details item with the ‘messageDetails’ key using format «messageDetails.itemKey» e.g. «messageDetails.username».
Inserting List Field Data
To insert a value from a selected list item, prefix the merge field with the external label of the list field followed by the external label of the desired list item using format {«listFieldExternalLabel.itemExternalLabel»}} e.g. to access the code field within a stock list field use merge label «stock.code».
Dot Notation
Transsend uses dot notation to access properties of messages. This means when accessing child values, i.e. those contained within other values like list items, message details or parent templates, use the parent items key or external label followed by a ‘.’ then the child items key or external label.
Transformation Options
The settings for the document transformation allow you to control the output type and also how images and signatures are sized.
| Option | Description |
|---|---|
| MS Word Template | The Word document to use as the template. This file should contain the mail merge fields where the message data will be inserted. This file can be in doc or docx format. If the output of the document transformation is PDF and you are having some problems with the quality, such as artefact or non solid fill areas, try changing the file format from one to the other, e.g. from doc to docx. |
| Filename | This is the filename of the transformed file. The value for this setting can contain a FreeMarker Template. It is important the the suffix of the filename matched the type of the output document. For example if you select PDF as the output then the suffix of the filename value should be ‘.pdf’. |
| Resize Images | Enable this option to resize photos before inserting into the document. |
| Resize Width | The width to target for the resize. |
| Resize Height | The height to target for the resize. |
| Percentage Resize | Enable this option to resize based on a percentage of the original image size. Should be > 0 and <= 100. |
| Trim Images | Will attempt to auto crop the image. Particularly useful for signatures to remove excess white colour surrounding the actual signature. This is applied before the image is resized. |
| Make Images Transparent | Enable this option to be able to make a colour in the image transparent. |
| Transparent Colour | The name or rgb hex value of the colour to make transparent, e.g.white or #FFFFFF. |
| Flatten | Flattens all layers in the image. This is useful if you are having issues with resized signatures in PDF documents. |
| Condition | The rules that must match for this document transformation to be applied. |
Optional Document Attachments
Use a condition on the document transformation to optionally added extra files to a email. This is useful for example when doing an inspection and an extra form must be completed under certain conditions. Rather than having two routes setup and receiving two emails for each message this option allows you to receive a single email with an optional number of documents attached.
Image Resizing
Image resizing in Transsend is done using ImageMagick. When images are resized, the order of operations to follow is:
- Trim: corresponds to the -trim option followed by +repage in ImageMagick.
- Resize: corresponds to the -resize option in ImageMagick.
- Flatten: corresponds to the -flatten option in ImageMagick.
- Transparent: corresponds to the -transparent-color option in ImageMagick.
The image resizing settings currently apply to both photos and signatures as well as all kinds of devices.