
There are three key steps to creating a List.
- Create the List definition Template
- Create the List
- Import the data for the List items
Step 1. Create the List definition Template
A List is based on a Template. The Template defines the format for a single data item in a List and must be created before the List.
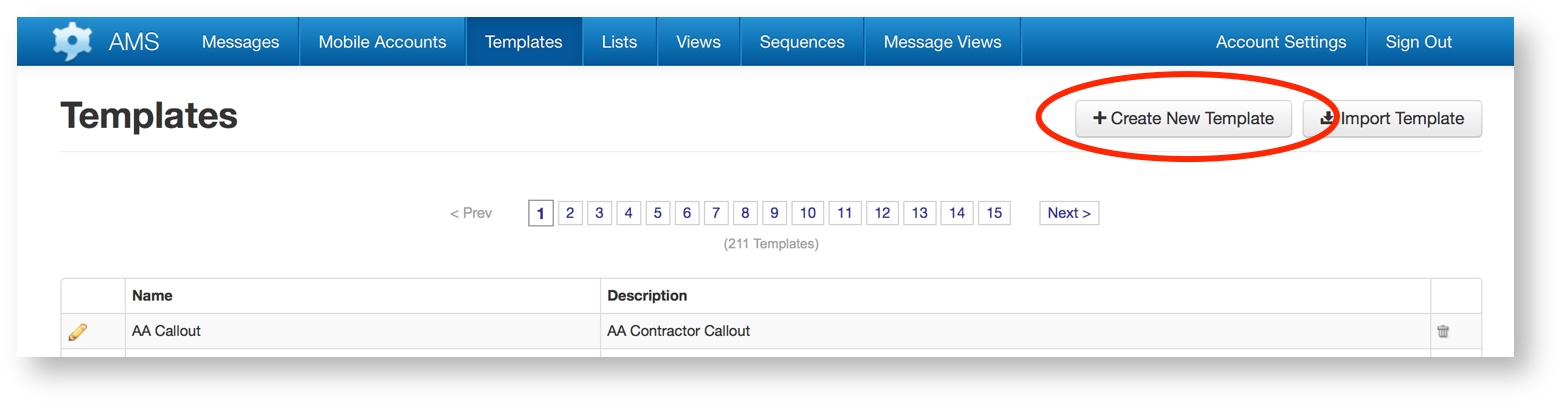
Navigate to the Template tab within the Transsend web management application and click “Create New Template”.
Summary Tab
Complete the Summary tab fields to define the Template details:
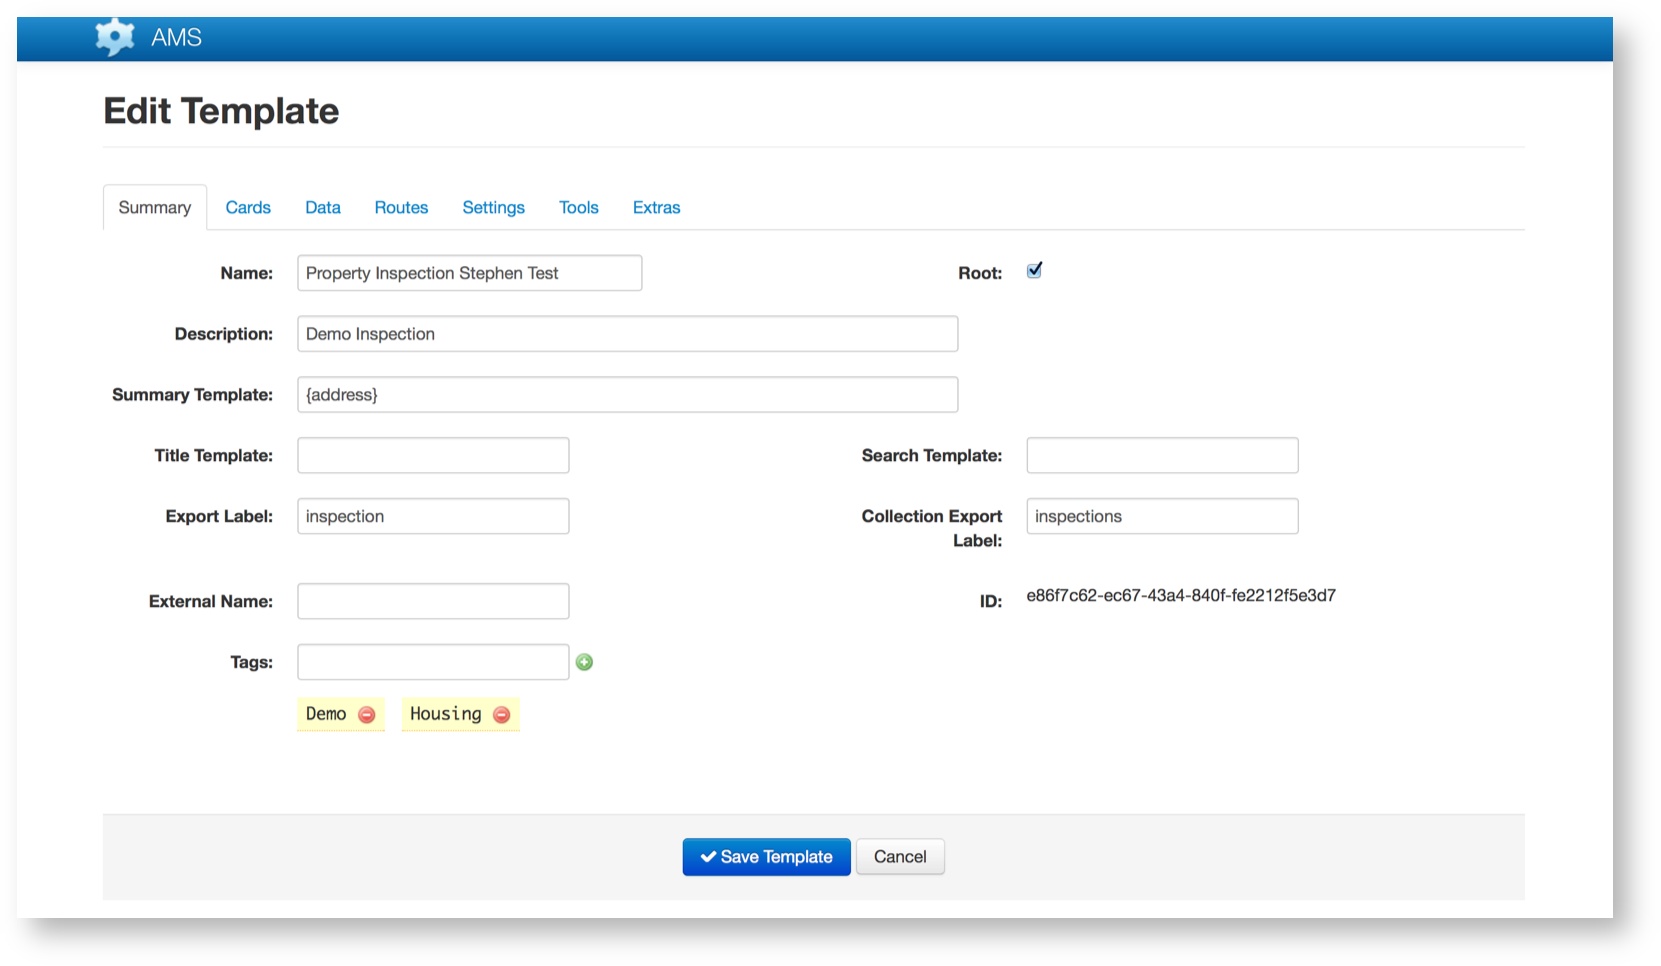
Each List needs a Name and a Description for the Template. The Summary Template field defines the text to be shown in the summary for the list items, including fixed text and field data from the list items themselves.
A List Template can be assigned to one or more Tags, just like a normal Template. This will automatically assign this List to matching Mobile Accounts.
Cards Tab
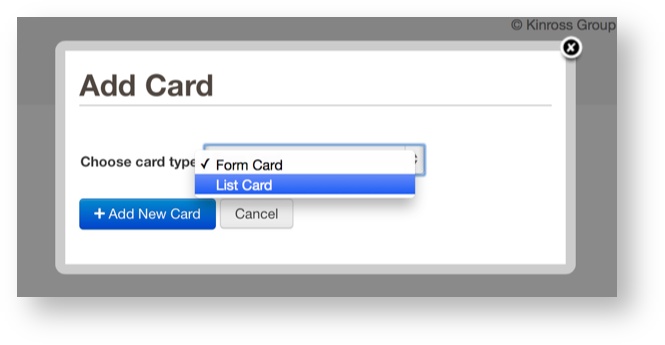
The only other definition required to create a new List Template is to create and define a Card on the Cards Tab.
Navigate to the Cards Tab and click “+ Add Card”, select “Form Card” from the dialog box and click “+ Add New Card”:
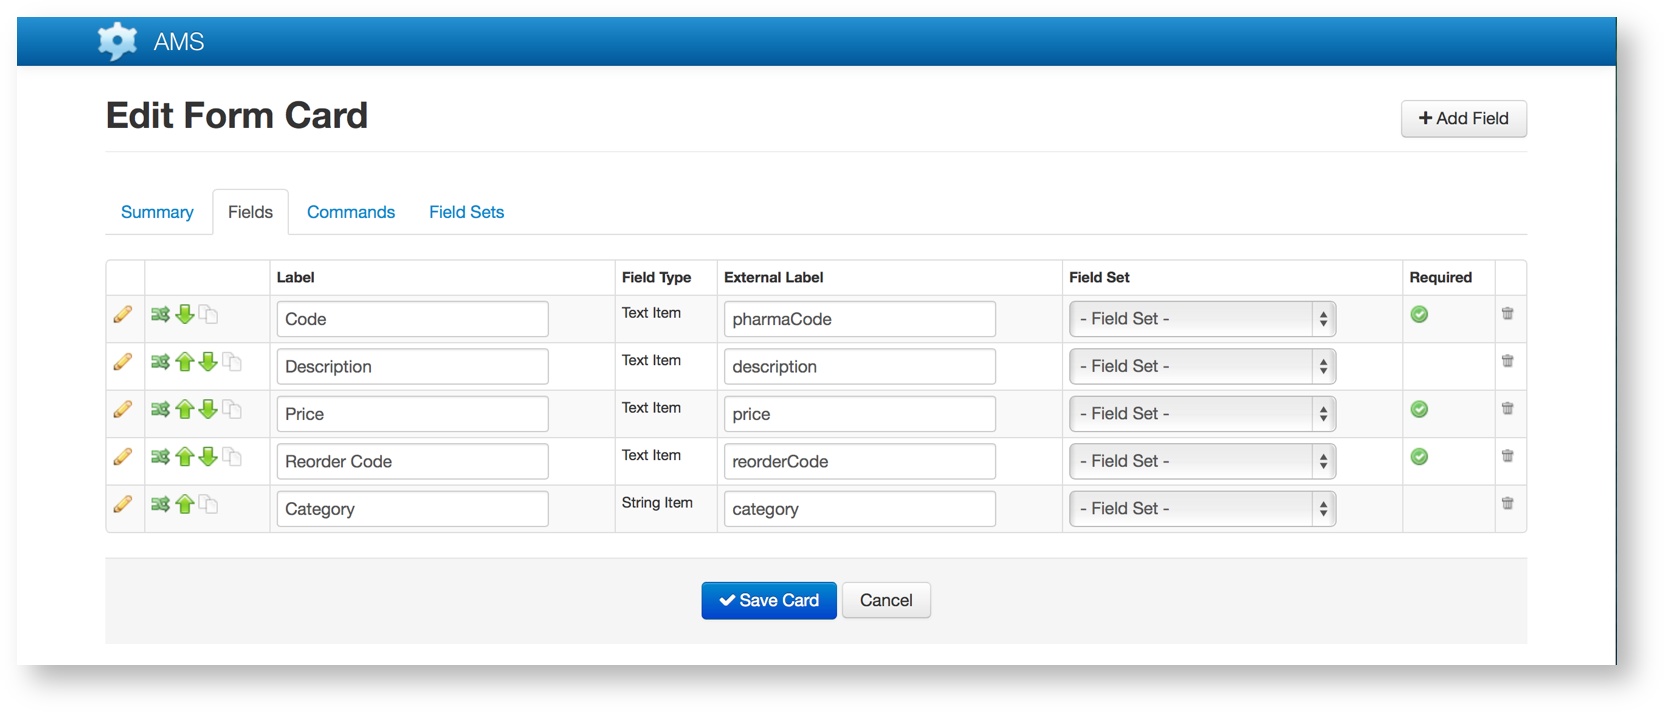
Fill in the Name of the new card on the Summary tab, and then navigate to the Fields Tab to define the data fields to be included in the List.
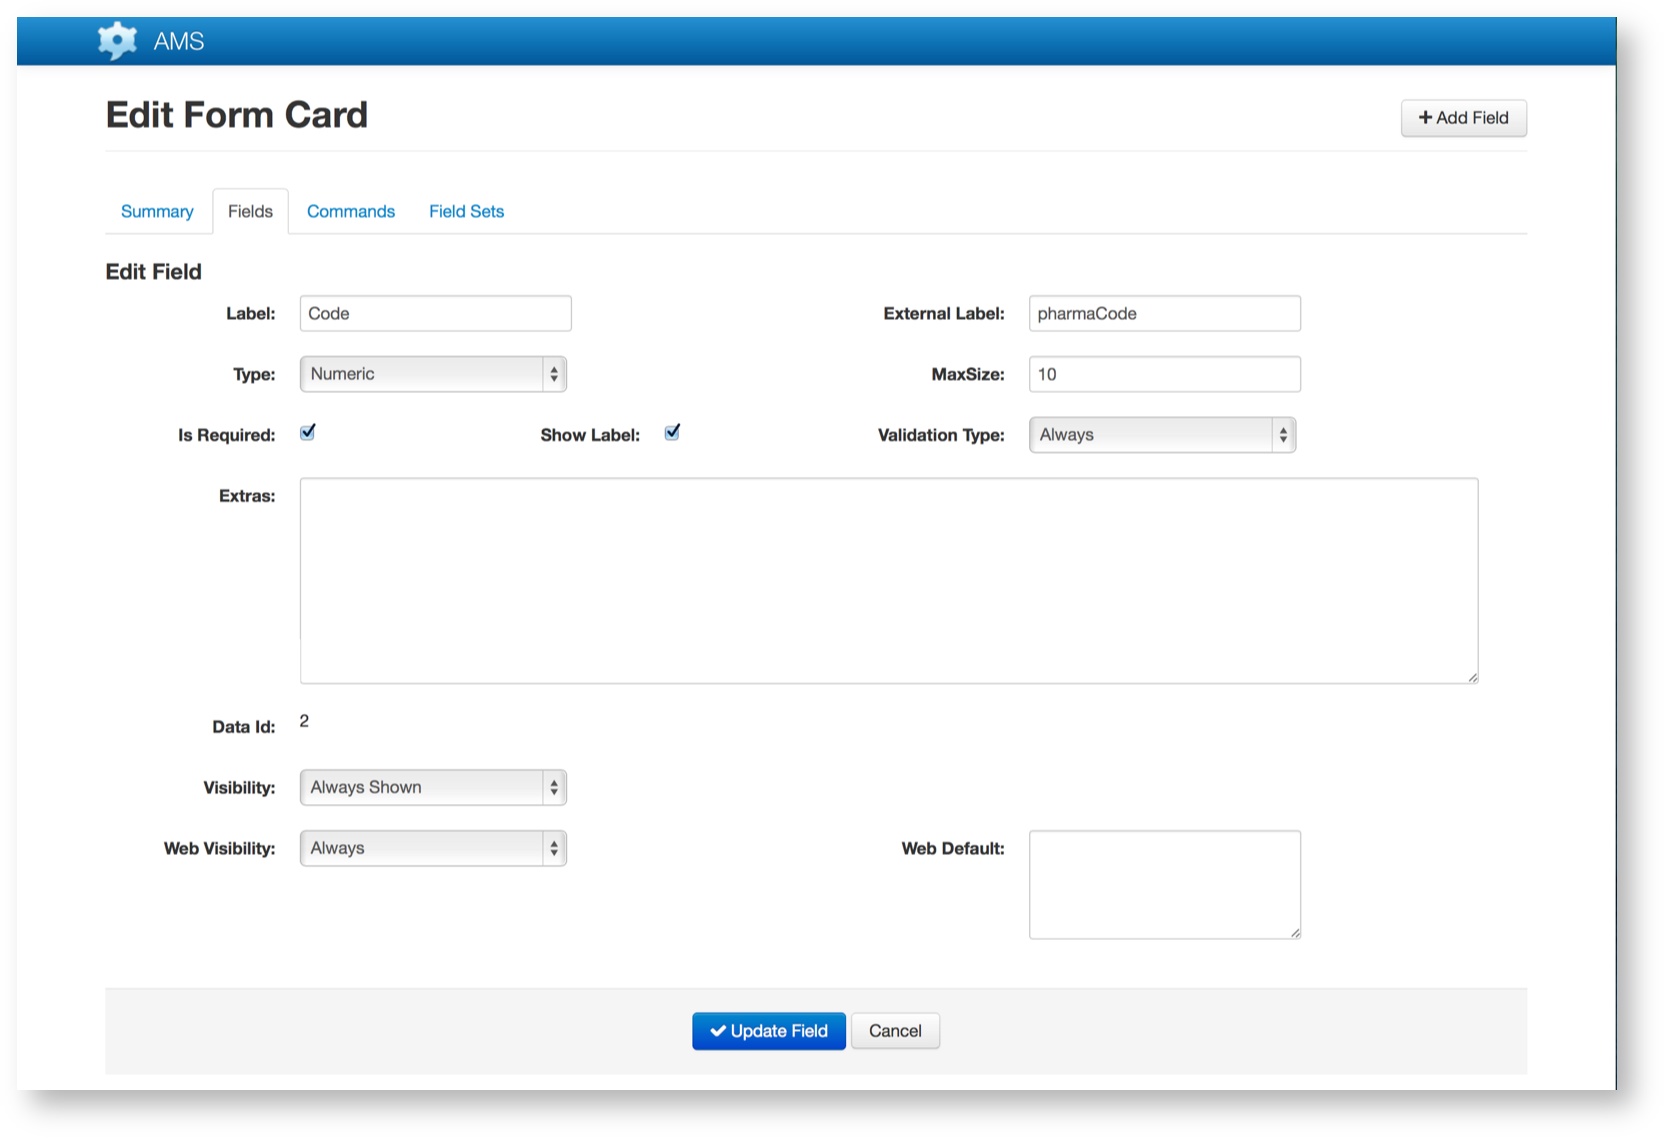
Each Field requires the following attributes to be specified:
- Label - the human-readable name of the data item
- External Label (how the rest of Transsend refers to the field)
- Field Type and MaxSize (length)
- Whether the Field is required or not
- Whether the Field Label is to be shown in the list
- Validation required - Always, or only if visible
Optionally you may also define the following
- Field Set - Groups of one or more Fields defined in a Set
Once all of the fields for the List Template are defined they are visible in the Card view:
In order to be used to create a List, a Template must conform to the following rules:
- It must provide a field or meta data key for the id of the list item. The value for the id must be either an integer or a string.
- It must provide a field or meta data key to index the list on. This value will be used to group the items into categories for easy selection on the device. If you do not need a category you must still provide a value to index on. In this case you should use the same value for all items and create it as a meta data key so that it is hidden.
- It must provide a value to filter on. This value is used to allow searching the items on the phone. It should be the value that items differ by the most.
- The template cannot contain any child templates, i.e. List Cards.
Additionally some things to consider when creating your Template for the List items:
- Use a meta data key for item values that will not be displayed on the device
- Use a String field for read-only items
- If all items in the list have same index,they will be displayed immediately on the device (i.e. the category selection step will be skipped)
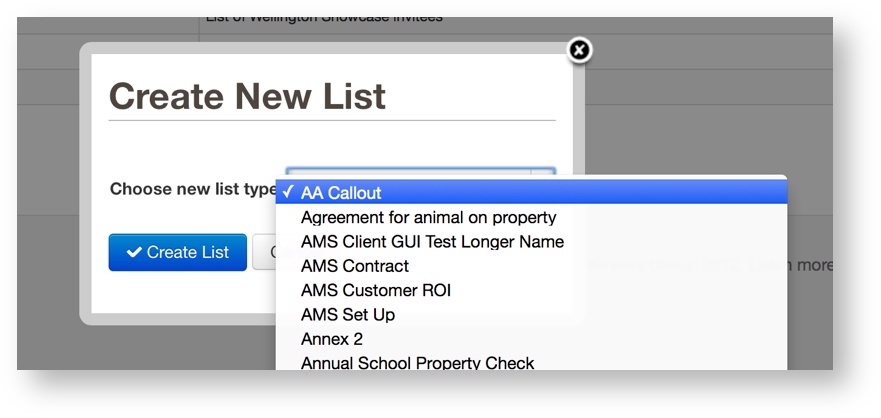
Once the Template for the list items has been created go to the “Lists” page of the web application, click “Create New List” and select the template created previously then click “Create List”.
Create the List
Once the List Template has been created, it is possible to create one or more Lists using the Template.
Navigate to the List tab and click “+ Create New List”:

Then select the List template from the drop down box in the dialog:
Summary Tab
Once the List Template has been selected, configure the Summary details for the new List:
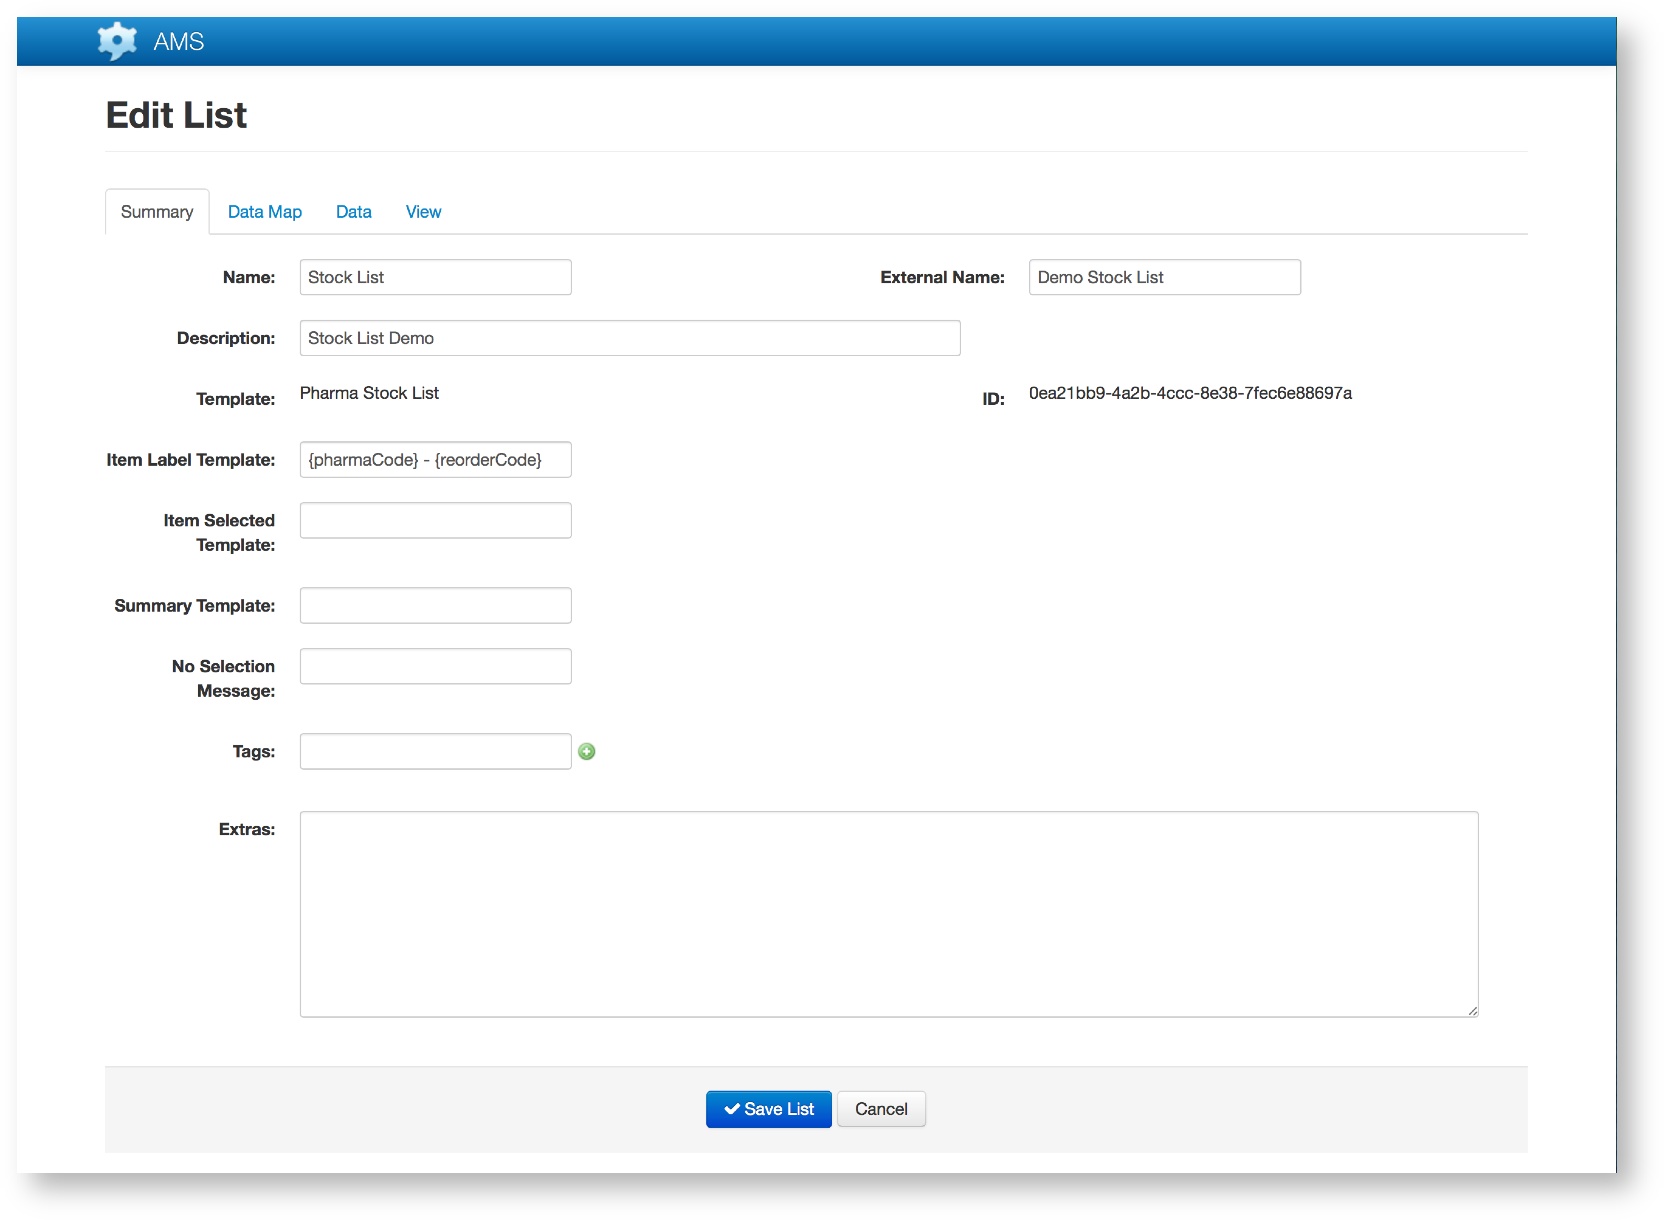
The Summary Tab fields are as follows:
| Name | Editable | Description |
|---|---|---|
| Name | Yes | The internal name of the List. |
| External Name | Yes | The external name of the list is used to refer to the list in the API. |
| Description | Yes | A longer description of the List. Appears in Help and Hover text when a user has the List name visible in the Form etc. |
| Template | No | The Template from which the List was created. |
| ID | No | The unique ID assigned to the List by Transsend when the List was created |
| Item Label Template | Yes | The template used to define the name which appears in the List within a Form. This is made up of fixed characters and of data items from the List itself. Template definition uses the same format as summary templates for Transsend templates and can reference any fields in the template used for items in the list.Default: The id value of the item. |
| Item Selected Template | Yes | The template used to define the name which appears in the List within a Form for the currently selected item. This is made up of fixed characters and of data items from the List itself. Template definition uses the same format as summary templates for Transsend templates and can reference any fields in the template used for items in the list.Default: The id value of the selected item. |
| Summary Template | Yes | The summary format of the template used for items from the list. Template definition uses the same format as summary templates for Transsend templates and can reference any fields in the template used for items in the list.Default: The summary format of the template used for items from the list. |
| No Selection Message | Yes | Message shown when no list item has been selected. Definition is a plain string message to indicate no item from the list is selected.Default: “No Item Selected” |
| Tags | Yes | Tags are used to group similar Lists together (e.g. “health”, “stock”). Tags can be added and removed. Pre-existing Tags can be added, and new Tags created. |
| Extras | Yes |
Data Map Tab
Every list must include several key fields, these fields are included in the data map.
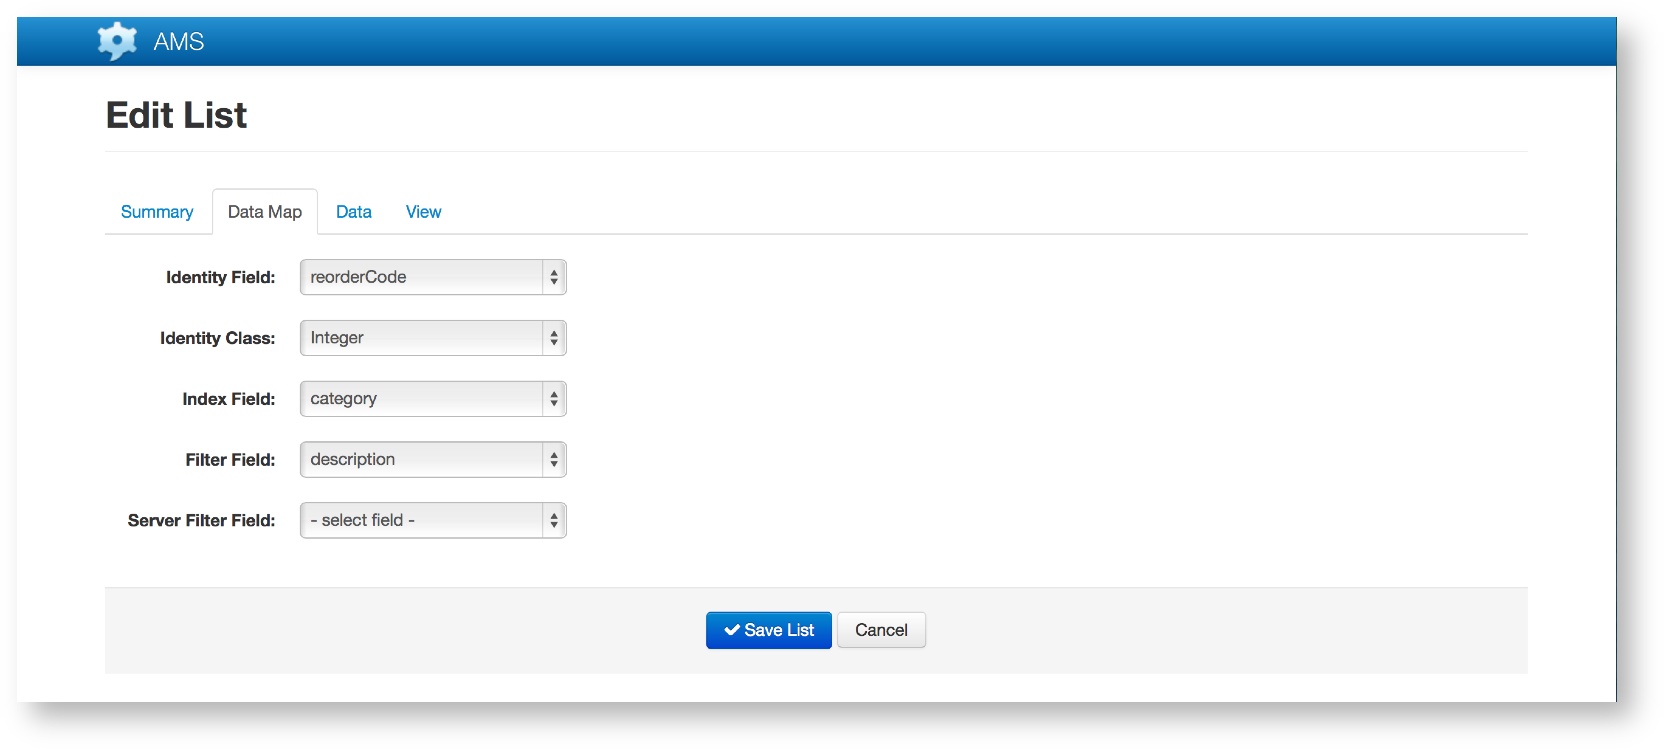
The data map is the most important part of the list definition. It tells Transsend how to encode and group the list’s data on the device. For each of the items on this tab select the source Field from the Template which was used to define the List.
| Data Map Item | Description |
|---|---|
| Identity Field | This is the data value that will be used when a list item is accessed by other messages (i.e. List’s index used to access a specific item within the List). The Identity Field must contain a unique value in each List entry. For example, if the identity field of a stock list was the “stock code”, then when a stock order is created using another message, the “stock code” is the value that will be set in the message. |
| Identity Class | This is the data type of the identity field and can be either “String” or “Integer”. Use “Integer” if possible as it requires less storage space on the device. |
| Index Field | This is the data value which will be used to group the list data (i.e. Group By). For example, in a stock list this might be the stock category.The Index Field should be a value with repeats across multiple List entry. To hide the Category entry step, set all Index Field values to the same value within a list.The following screenshot illustrates what the entry view of a List look like (Samsung 4.4.2) when a series of values are used at the Index Field level to combine individual items into groups: 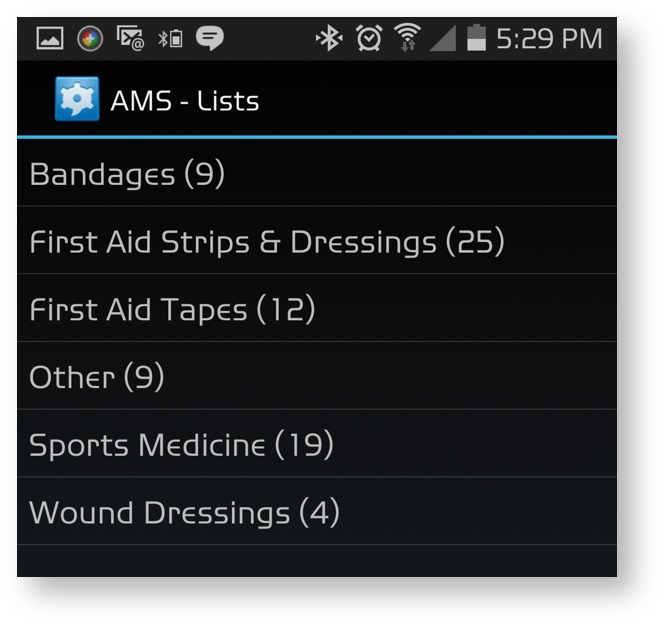 |
| Filter Field | This is the field by which the user will search the list on their device. It allows the items displayed to be filtered by matching the search value (not case sensitive) with the start of the corresponding data item’s value for that field. For example, in a stock list we could filter by description.The following screenshot illustrates the filtering of a list based on the Filter Field (Samsung 4.4.2):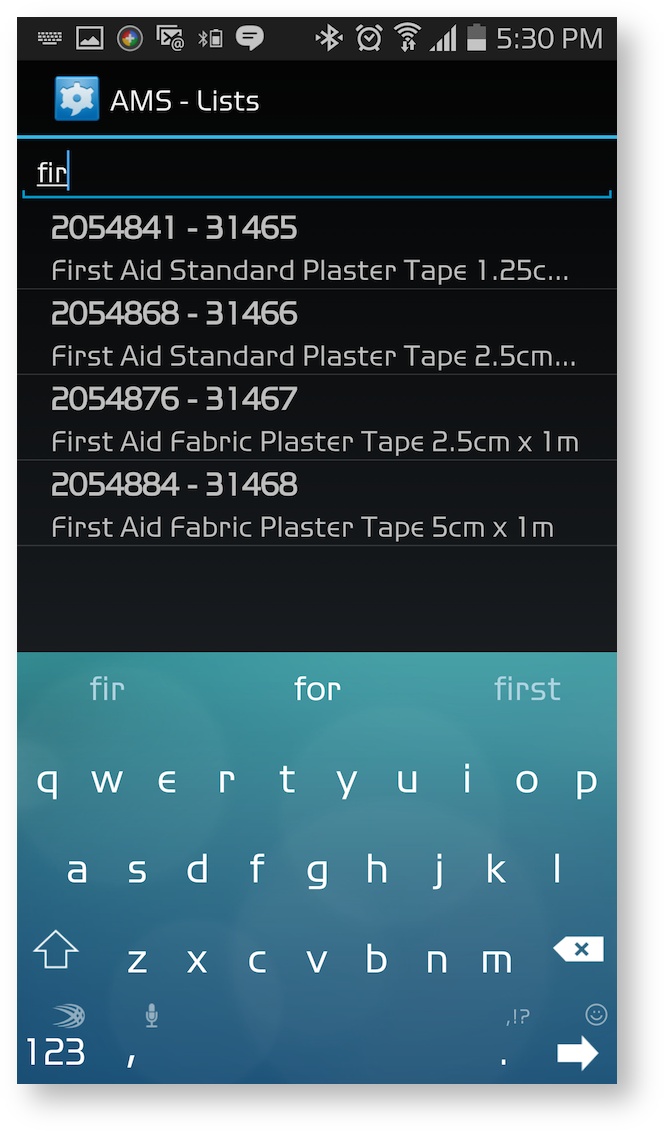 |
| Server Filter Field | This field allows the list to be filtered on the server side, allowing for a subset of the full List to be assigned to different users. For example, the list of stores available to an individual sales person can be restricted to their sales region by using the Server Filter Field and assigning that to a metadata item maintained within their Mobile Account field. |
Data Tab
The Data tab allows for the importing of data to populate the list.
Details can be found here.

Data can be imported multiple times. Subsequent imports will completely replace existing data in the list. For this reason, there are several key rules that must be followed for imports:
- Every import must include ALL data for the list, not just changed or new data.
- The Identity Field and Identity Class MUST remain consistent across imports. That is, each pre-existing item must use the same Identify Field value in any subsequent imports. Not doing so will risk creating data inconsistencies between devices, messages and on the Transsend gateway.
View
Displays the current items in the list.